All of the attributes are connected to the Style you use. The best thing to do would be to create your own Style with the numbering, positioning, etc all set as you want it to appear.
You can copy the existing H1 Style and remove the “Chapter” text and then add the extra spacing above the title.
This is how to do it:
With your cursor positioned in the chapter heading, click on the Style icon  . This will open the Style dialog.
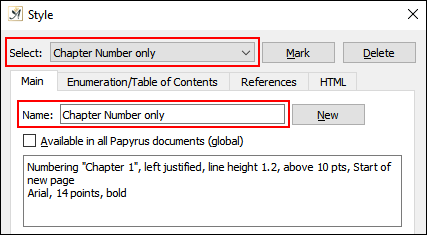
Make sure the “Name” field shows the heading Style you want to use as a template i.e. “Chapter Numbered”. Type a new name, e.g. “Chapter number only”.
Click on the “New” button.
Now both the “Select” and “Name” fields should show your new Style.:
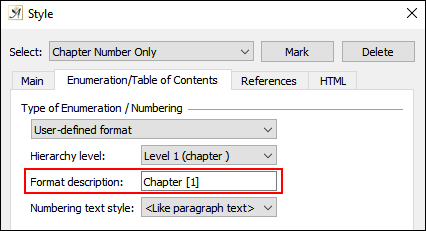
Go to the “Enumeration / Table of Contents” tab.
The field “Format description” contains the default text that will appear. For numbered Chapters the “[1]” means they will be numbered consecutively.
If you want only the numbers to appear, just remove the word “Chapter”.
To change the distance from the top margin - keeping the Style dialog open, go back to the “Main” tab and click on the “Advanced” button next to the “Paragraph format” option. This will open the “Advanced Paragraph Formatting” dialog.
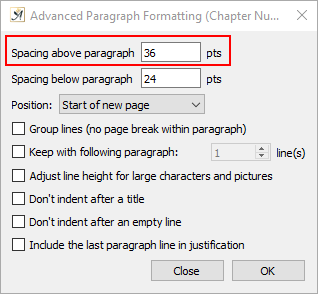
The top option, “Spacing above paragraph” controls the amount of extra space inserted above the heading. Set this to the value you require and click “OK”.
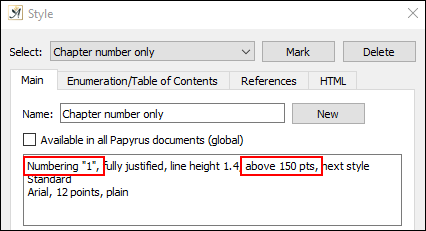
This will return you to the Style dialog.
You will see the changes you have made in the description of the Style:
To apply this Style to all your existing chapter headings:
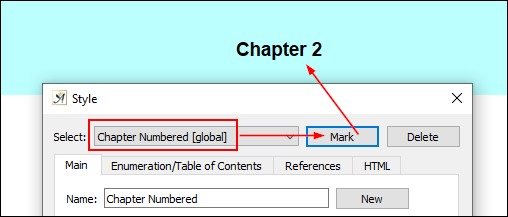
In the Style dialog select the original Style (Chapter Numbered) from the drop-down “Select” field.
Then click on the “Mark” button. This will highlight all the text in your document that is currently set to this style.
Now go to the Style drop-down in the toolbar and select your new Style:
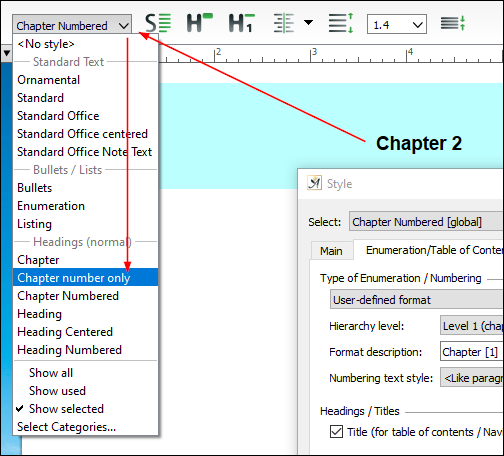
All your chapter headings should now be assigned with your new Style.
You can also assign this to a toolbar icon:
In the Style dialog, ensure you have your new Style selected then go to the “References” tab
Use the drop-down list “Assign style to toolbar icon (local)” to assign the Style just for the current document, or “Assign style to toolbar icon (global)” to assign the Style to the icon across all Papyrus Author documents.

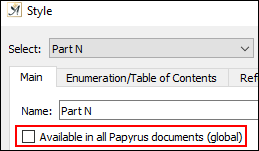
Remember, though, that you cannot assign a Style to an icon “globally” if the Style is set to local (see the “Main” tab) and vice versa.
The options “Custom 1” to “Custom 4” relate to the toolbar icons  to
to  .
.
Click the “Apply” button.
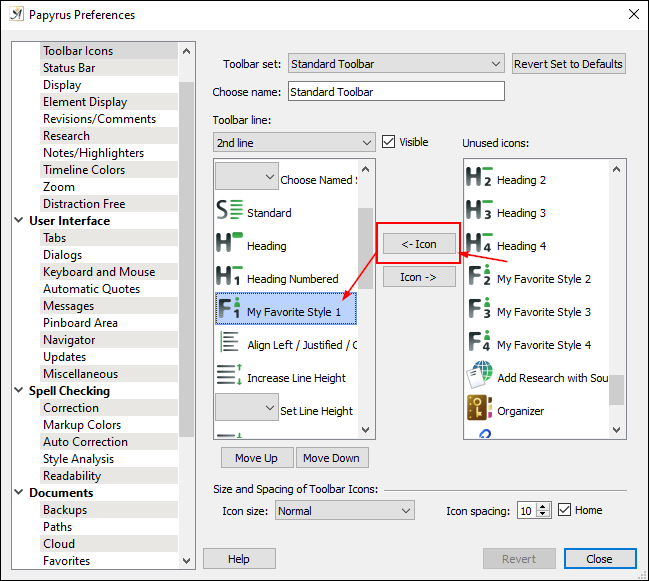
You can add the icon to your toolbar by right clicking in the toolbar and selecting “Customize Toolbar…”
Scroll down the unused icons in the right-hand list until you find the custom icons (called ‘Favorite’). Using the “← Icon” button to move it to the visible toolbar and position with the “Move Up” or “Move Down” buttons.

Let me know how it goes 